Install WriteFreely v.0.7.1 - Ubuntu 18.04, Nginx, SQLite - based on an AWS EC2 instance.
Disclaimer: Getting WriteFreely up and running on a VPS for the person on the street - in other words ‘for the layperson’. I am very far away from being a developer type. I can put a basic website together and upload it to a server; cope with very, very simple problem solving in code etc; that’s about it. So this guide is pretty simple from these perspectives.
You’ll need to be comfortable with the Terminal/Command Line, as you are probably setting WriteFreely up to self-host then I expect this is the case.
Whilst this works for me, a more experienced Developer/Programmer etc will have differing perspectives and solutions. Also your user case might not exactly match my own.
SSH to your server
As the logged in $USER
Update, Upgrade and Secure your server to your requirements
sudo apt update
sudo apt upgrade -y
Install Nginx
sudo apt install nginx
Set up UFW - Uncomplicated Firewall
sudo ufw allow 'Nginx HTTP'
sudo ufw allow 'OpenSSH'
sudo nginx enable
sudo ufw status
Check status of Nginx
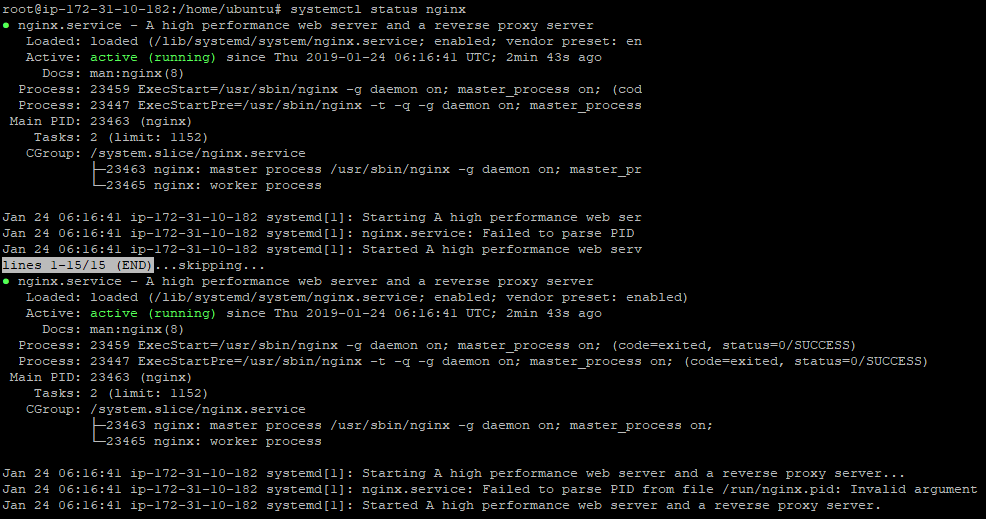
systemctl status nginx
Output:
● nginx.service - A high performance web server and a reverse proxy server
   Loaded: loaded (/lib/systemd/system/nginx.service; enabled; vendor preset: enabled)
   Active: active (running) since Fri 2018-04-20 16:08:19 UTC; 3 days ago
     Docs: man:nginx(8)
 Main PID: 2369 (nginx)
    Tasks: 2 (limit: 1153)
   CGroup: /system.slice/nginx.service
           ├─2369 nginx: master process /usr/sbin/nginx -g daemon on; master_process on;
           └─2380 nginx: worker process
Go to:
http://your_server_ip
Confirm that the server is running. You should see the Nginx landing page.
If not already download WriteFreely to your local machine.
Unzip to a local folder.
Back in Terminal/Command Line.
Ensure you are in the HOME folder. Usually called something like /home/$USER
create a new folder sudo mkdir -p /home/$USER/writefreely/
Assign ownership of the directory
sudo chown -R $USER:$USER /home/$USER/writefreely/
The permissions of your web roots should be correct if you haven’t modified your umask value, but you can make sure by typing:
sudo chmod -R 755 /home/$USER/writefreely
Make a new server block at /etc/nginx/sites-available/example.com:
sudo nano /etc/nginx/sites-available/writefreely
Paste in, ensure to change bold values to your needs:
server {
    listen 80;
    listen [::]:80;

    server_name example.com;

    gzip on;
    gzip_types
      application/javascript
      application/x-javascript
      application/json
      application/rss+xml
      application/xml
      image/svg+xml
      image/x-icon
      application/vnd.ms-fontobject
      application/font-sfnt
      text/css
      text/plain;
    gzip_min_length 256;
    gzip_comp_level 5;
    gzip_http_version 1.1;
    gzip_vary on;

    location ~ ^/.well-known/(webfinger|nodeinfo|host-meta) {
        proxy_set_header Host $host;
        proxy_set_header X-Real-IP $remote_addr;
        proxy_set_header X-Forwarded-For $remote_addr;
        proxy_pass http://127.0.0.1:8080;
        proxy_redirect off;
    }

    location ~ ^/(css|img|js|fonts)/ {
        root /home/$USER/writefreely/static;
        # Optionally cache these files in the browser:
        # expires 12M;
    }

    location / {
        proxy_set_header Host $host;
        proxy_set_header X-Real-IP $remote_addr;
        proxy_set_header X-Forwarded-For $remote_addr;
        proxy_pass http://127.0.0.1:8080;
        proxy_redirect off;
    }
}
Save and close the file when you are finished.
Enable the file by creating a link from it to the sites-enabled directory:
sudo ln -s /etc/nginx/sites-available/writefreely /etc/nginx/sites-enabled/
To avoid a possible hash bucket memory problem that can arise from adding additional server names, it is necessary to adjust a single value in the /etc/nginx/nginx.conf file. Open the file:
sudo nano /etc/nginx/nginx.conf
Find the server_names_hash_bucket_size directive and remove the # symbol to uncomment the line:
/etc/nginx/nginx.conf
http {
    ...
    server_names_hash_bucket_size 64;
    ...
}
Test for syntax errors:
sudo nginx -t
Restart Nginx to enable your changes:
sudo systemctl restart nginx
Using your favourite FTP program upload the WriteFreely files to the /home/$USER/writefreely directory.
Once done:
cd writefreely
./writefreely --config
Follow the prompts.
./writefreely --init-db
./writefreely --gen-keys
./writefreely --create-admin username:password
Set WriteFreely up as a service.
sudo nano etc/systemd/system/writefreely.service
Paste:
[Unit]
Description=Write Freely Instance
After=syslog.target network.target

[Service]
Type=simple
StandardOutput=syslog
StandardError=syslog
WorkingDirectory=/home/$USER/writefreely
ExecStart=/home/$USER/writefreely/writefreely
Restart=always

[Install]
WantedBy=multi-user.target
Restart Nginx:
sudo systemctl restart nginx
Start the service:
sudo systemctl start writefreely
Visit your ip:
http://your_server_ip
If you have a registered domain you can now set up Let’s Encrypt via the Certbot plugin.
Visit https://certbot.eff.org/ . Select Nginx and Ubuntu 18.04LTS
sudo apt-get update
sudo apt-get install software-properties-common
sudo add-apt-repository universe
sudo add-apt-repository ppa:certbot/certbot
sudo apt-get update
sudo apt-get install python-certbot-nginx
Run to let CertBot automatically set up:
sudo certbot --nginx

